Developing a new plug-in
Before you begin this tutorial, make sure that you completed the Extending an existing plug-in tutorial.
Overview#
This tutorial demonstrates how to create a brand new Zowe™ CLI plug-in that uses Zowe CLI Node.js programmatic APIs.
At the end of this tutorial, you will have created a data set diff utility plug-in for Zowe CLI, from which you can pipe your plugin's output to a third-party utility for a side-by-side diff of data set member contents.
Completed source for this tutorial can be found on the develop-a-plugin branch of the zowe-cli-sample-plugin repository.
Cloning the sample plug-in source#
Clone the sample repo, delete the irrelevant source, and create a brand new plug-in. Follow these steps:
cdinto yourzowe-tutorialfoldergit clone https://github.com/zowe/zowe-cli-sample-plugin files-utilcd files-util- Delete the
.git(hidden) folder. - Delete all content within the
src/api,src/cli, anddocsfolders. - Delete all content within the
__tests__/__system__/api,__tests__/__system__/cli,__tests__/api, and__tests__/clifolders git initgit add .git commit -m "initial"
Changing package.json#
Use a unique npm name for your plugin. Change package.json name field as follows:
Issue the command npm install against the local repository.
Adjusting Imperative CLI Framework configuration#
Change imperative.ts to contain the following:
Here we adjusted the description and other fields in the imperative JSON configuration to be relevant to this plug-in.
Adding third-party packages#
We'll use the following packages to create a programmatic API:
npm install --save diffnpm install -D @types/diff
Creating a Node.js programmatic API#
In files-util/src/api, create a file named DataSetDiff.ts. The content of DataSetDiff.ts should be the following:
Exporting your API#
In files-util/src, change index.ts to contain the following:
Checkpoint#
At this point, you should be able to rebuild the plug-in without errors via npm run build. You included third party dependencies, created a programmatic API, and customized this new plug-in project. Next, you'll define the command to invoke your programmatic API.
Defining commands#
In files-util/src/cli, create a folder named diff. Within the diff folder, create a file Diff.definition.ts. Its content should be as follows:
Also within the diff folder, create a folder named data-sets. Within the data-sets folder create DataSets.definition.ts and DataSets.handler.ts.
DataSets.definition.ts should contain:
DataSets.handler.ts should contain the following:
Trying your command#
Be sure to build your plug-in via npm run build.
Install your plug-in into Zowe CLI via zowe plugins install.
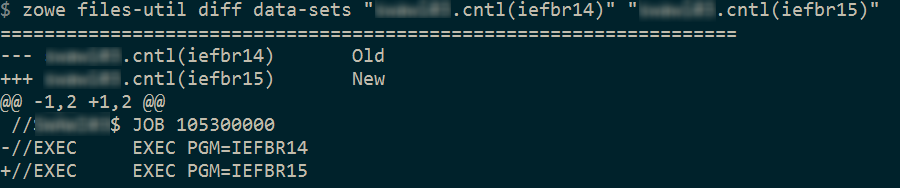
Issue the following command. Replace the data set names with valid mainframe data set names on your system:

The raw diff output is displayed as a command response:
Bringing together new tools!#
The advantage of Zowe CLI and of the CLI approach in mainframe development is that it allows for combining different developer tools for new and interesting uses.
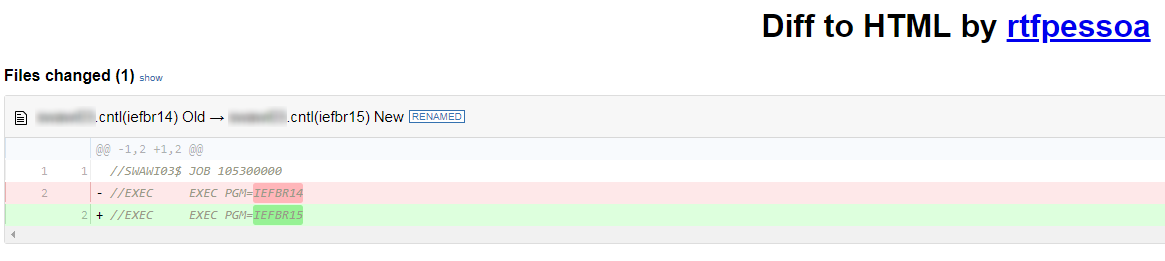
diff2html is a free tool to generate HTML side-by-side diffs to help see actual differences in diff output.
Install the diff2html CLI via npm install -g diff2html-cli. Then, pipe your Zowe CL plugin's output into diff2html to generate diff HTML and launch a web browser that contains the content in the screen shot at the top of this file.
zowe files-util diff data-sets "kelda16.work.jcl(iefbr14)" "kelda16.work.jcl(iefbr15)" | diff2html -i stdin
Next steps#
Try the Implementing profiles in a plug-in tutorial to learn about using profiles with your plug-in.